Project Settings
Project settings allow you to configure the settings related to the project.
Press the button
 at the bottom of the inspector to display the project settings.
Project
-
Name
Set the name of the project.

PLC
-
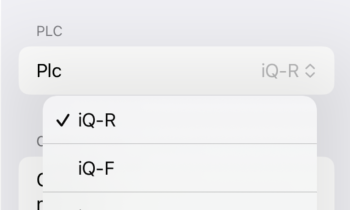
Plc
Select the model of the PLC.
If no applicable model is available, select a PLC with a similar device configuration. The device can be used within the device range handled by the selected PLC.
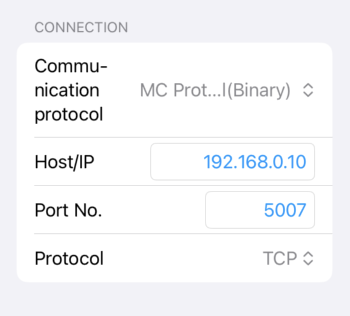
Connection
Specify how to connect to the PLC.
See the
PLC connection
for details on the settings for each PLC.
-
Communication protocol
Select the communication protocol to use when communicating with the PLC.
Simulate is used to check the simulated operation of the irBoard by itself, without connecting it to a PLC or using it for presentations.
-
HOST/IP
Set the hostname or IP address of the PLC.
-
Port No.
Set the port number for the connection to the PLC.
-
Protocol
Sets the Ethernet protocol. Currently, only TCP is supported.
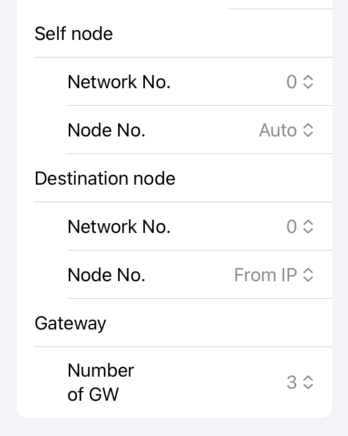
For Omron, the following extended settings are available:
-
Self node
-
Network No.
Sets the network number of its own node. Normally, it is set to 0. -
Node No.
Sets the node number of its own node, which is automatically determined at the start of communication when Auto is set. -
Destination node
-
Network No.
Sets the network number for the destination node. -
Node No.
Sets the node number of the destination node; if "From IP" is set, the trailing number of the IP address is used as the node number. -
Gateway
-
Network No.
Sets the number of allowed gateway passes.
For Yokogawa Electric, the following settings are used:
-
Network No.
Sets the network number.
For Omron
For Yokogawa Electric

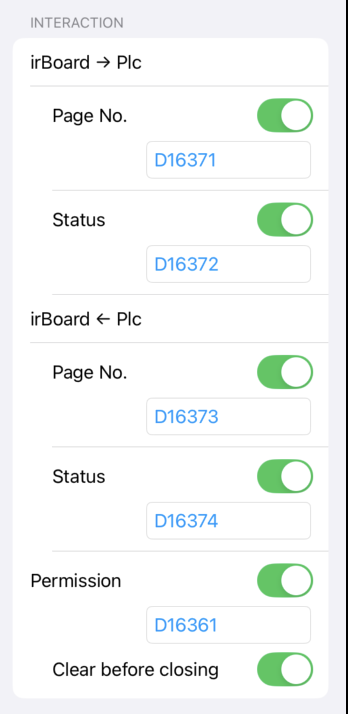
Interraction
Specify the device to control between the irBoard and the PLC.
If the toggle switch on the right is turned off, you can choose not to use that item for intercommunication.
-
irBoard→PLC
This device controls the PLC from the irBoard. -
Page No.
Specifies the PLC device to write the page number currently displayed on the irBoard. -
Status
Specify the PLC device to write the communication status from the irBoard.BIT Description 0 OFF: Disconnecting
ON: Connecting1 Healthy bit
Toggle OFF and ON repeatedly.
When it remains OFF or ON and does not change, a communication failure has occurred.2 Healthy bit
Toggle OFF and ON repeatedly.
When it remains OFF or ON and does not change, a communication failure has occurred. It works the same as bit1 for compatibility with our iOS apps, ioTouch2, and irPanel.3 - 15 Reserved for the future. -
irBoard←PLC
This device is used to control the irBoard from a PLC. -
Page No.
Specifies the device to which page switching is directed from the PLC. -
Status
Specify the device that directs limits from the PLC to the irBoard.BIT Description 0 OFF: No restrictions.
ON: Write-protect restriction.1 - 15 Reserved for the future. -
Permission
Using multiple devices to give operating instructions to a PLC is dangerous, as this may result in unexpected behavior. Therefore, irBoard limits the number of devices permitted to one device per permission area.
Use ten words in the Permission area starting with the device specified in the Permission.
The following are the rules for obtaining permission.
- If all the data in the permission area are zero, it acquires the permission to write its own data.
- If the data in the permission area matches your data, you have already obtained permission and will continue.
- If the data in the permission area does not match your data, another device has already obtained permission, and you cannot operate it; you can only read it.
- When disconnecting after acquiring permission, the permission data is cleared to zero, and the permissions are released to other devices. You can choose not to clear the data to zero by turning off the “Clear before closing" option.
Processing is required on the PLC side.
- If necessary, include a routine to initialize the permission data to zero at PLC startup.
- In the event of a communication failure, resetting the permission data from irBoard to zero may not be possible, and countermeasures may be necessary to address this issue.
-
Clear before closing
When turned on, the permission area is reset to zero when disconnected, releasing the permission so that other devices can connect to it. If you want to prohibit other devices from operating the device, turn it off and do not relinquish permission for it.
Screen size
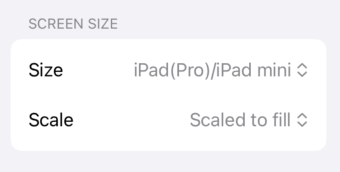
Select the screen size. If you want to draw on an iPad and execute the drawing on an iPhone, you can create the drawing based on the iPhone's screen size.
If the specified screen size differs from the screen size of the iOS device, the image will be enlarged or reduced to fit the screen.
Scale
Select how to scale the screen to fit when the size specified in Screen Size differs from the device's screen size.
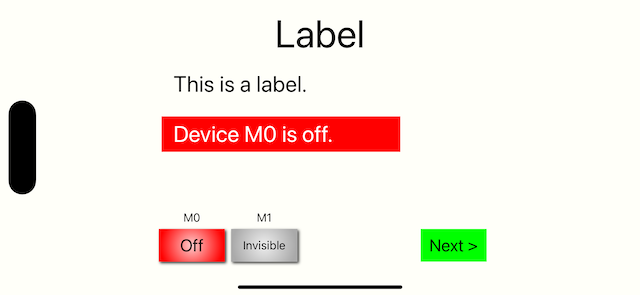
- Scaled to fit
- The image is scaled to maintain the screen's aspect ratio.
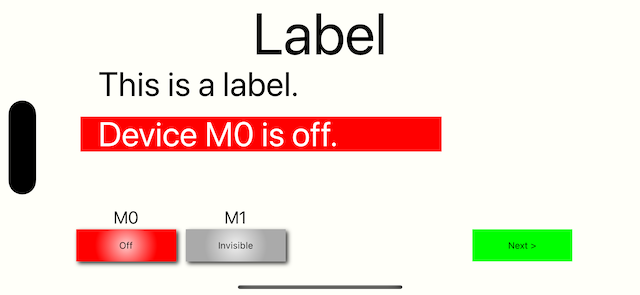
- Scaled to fill (default)
- The image is scaled to fit the size of the screen and is displayed in fullscreen.
Scaled to fit
Scaled to fill
Launch page
Sets the page number for the startup page.
When executed, it displays the specified page.
It then promptly moves to the page specified by the device, using the page number in the interaction section.

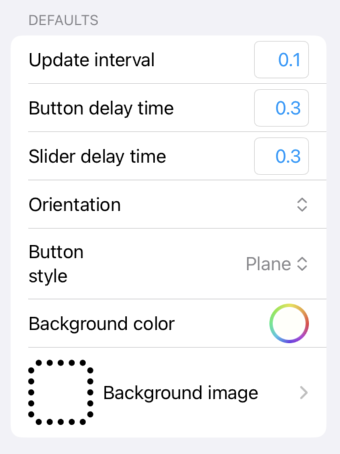
Default
Sets the default value for the project.
Default values are set when pages or items are added.
-
Update interval
This sets the interval to read the PLC devices. If communication takes longer than expected, the actual time may be longer than this. -
Slider delay time
Set the time in seconds between slider presses to prevent accidental touches and mishandling , since iOS devices respond immediately upon touch. If you want to speed up the reaction, shorten the time; however, be aware that this will also increase the number of false operations.
The slider setting takes precedence if a delay time is set using a slider configuration. -
Orientation
Specifies the orientation of the screen layout.
If the orientation is specified in the page configuration, then the page configuration takes precedence.-
Landscape
The layout is oriented in landscape mode. -
Portrait
The layout is oriented in portrait mode. -
Both
The layout is oriented in landscape and portrait mode.
If the device is oriented in landscape or portrait mode, the scale will change when the device orientation changes. -
Landscape
-
Button style
Specifies the style to apply when the button is added.
See more details about Styles for Button. -
Background color
Specifies the page's background color.
This applies to all pages, but the page configuration takes precedence if specified by the page. -
Background image
Specify a background image for the pages.
This applies to all pages, but the page configuration takes precedence if specified by the page.
See the Image Selection for instructions on how to select images.
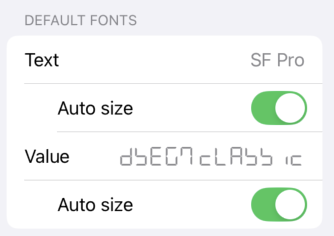
Default font
Specify the default font to use for labels, buttons, values, meters, etc.
-
Text
Specifies the default font to use for the text. -
Value
Specifies the default font to use for the numeric display.
