Documentation
KEYENCE: Upper link
It communicates with Keyence PLCs via the upper link.
KV-3000/5000/5500/7500/8000
PLC Project Creation
-
Create a new project in KV Studio.
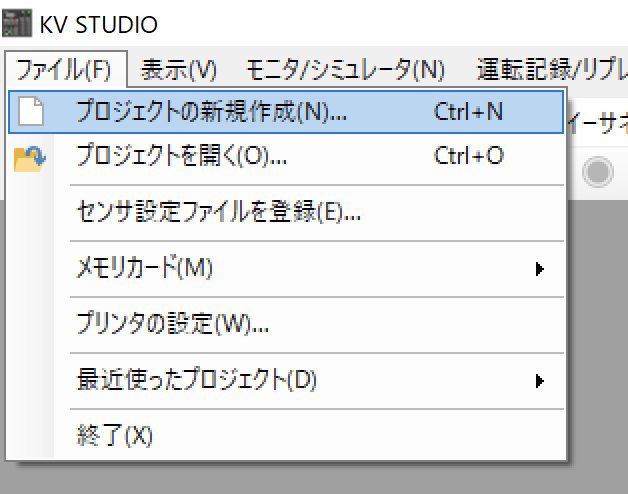
Select New Project... from the File menu.
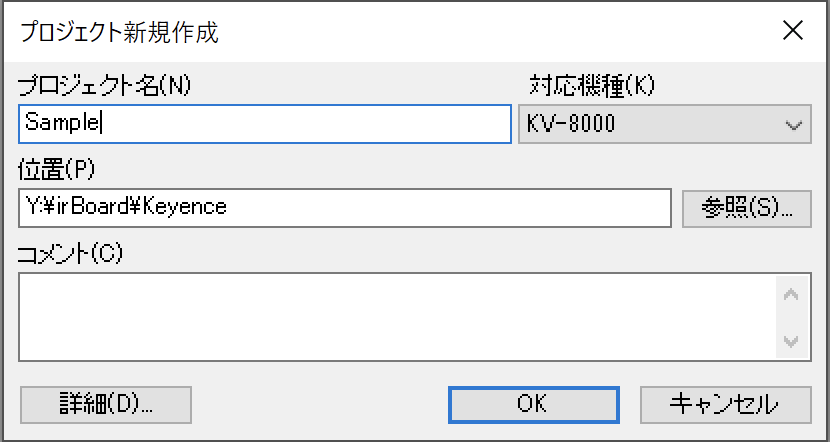
- Choose a project name and select a model. In this case, KV-8000 has been chosen.
For Ethernet with built-in PLC
- Select the CPU unit from the unit configuration in the project view and double-click it.

- Select the PLC unit, navigate to the Unit Settings (2) tab in the right unit view, set the IP address, and click the OK or Apply button.
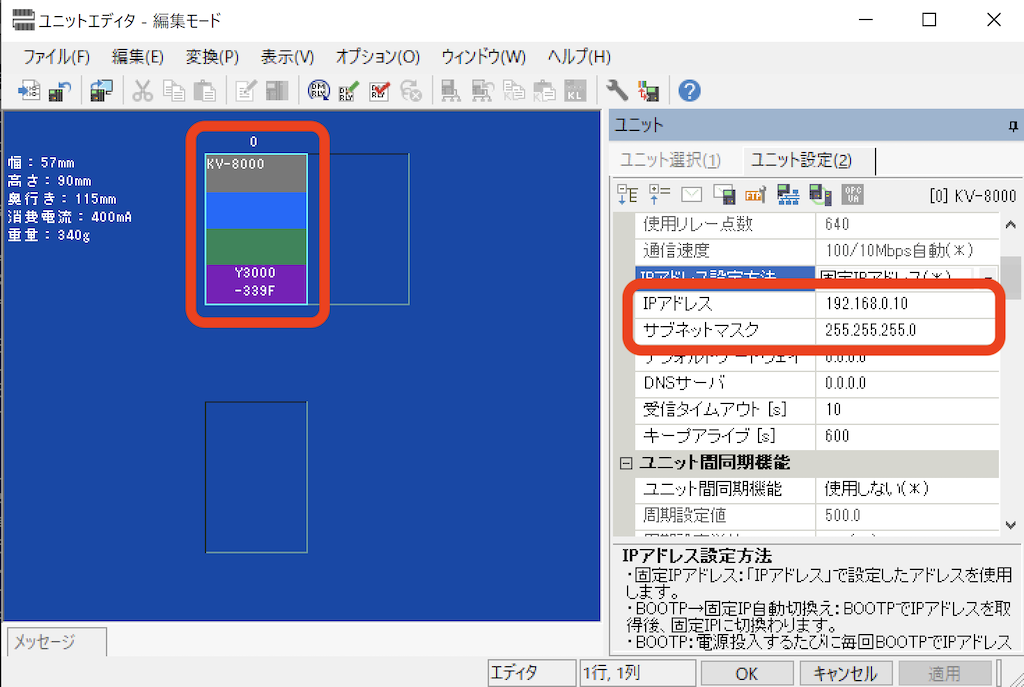
- Once the setup is complete, transfer the project to the PLC.
For KV-LE2* Ethernet module
- Select the CPU unit from the unit configuration in the project view and double-click it.

- Select the Unit Settings (1) tab in the Unit View on the right and drag the network unit away from the CPU unit.
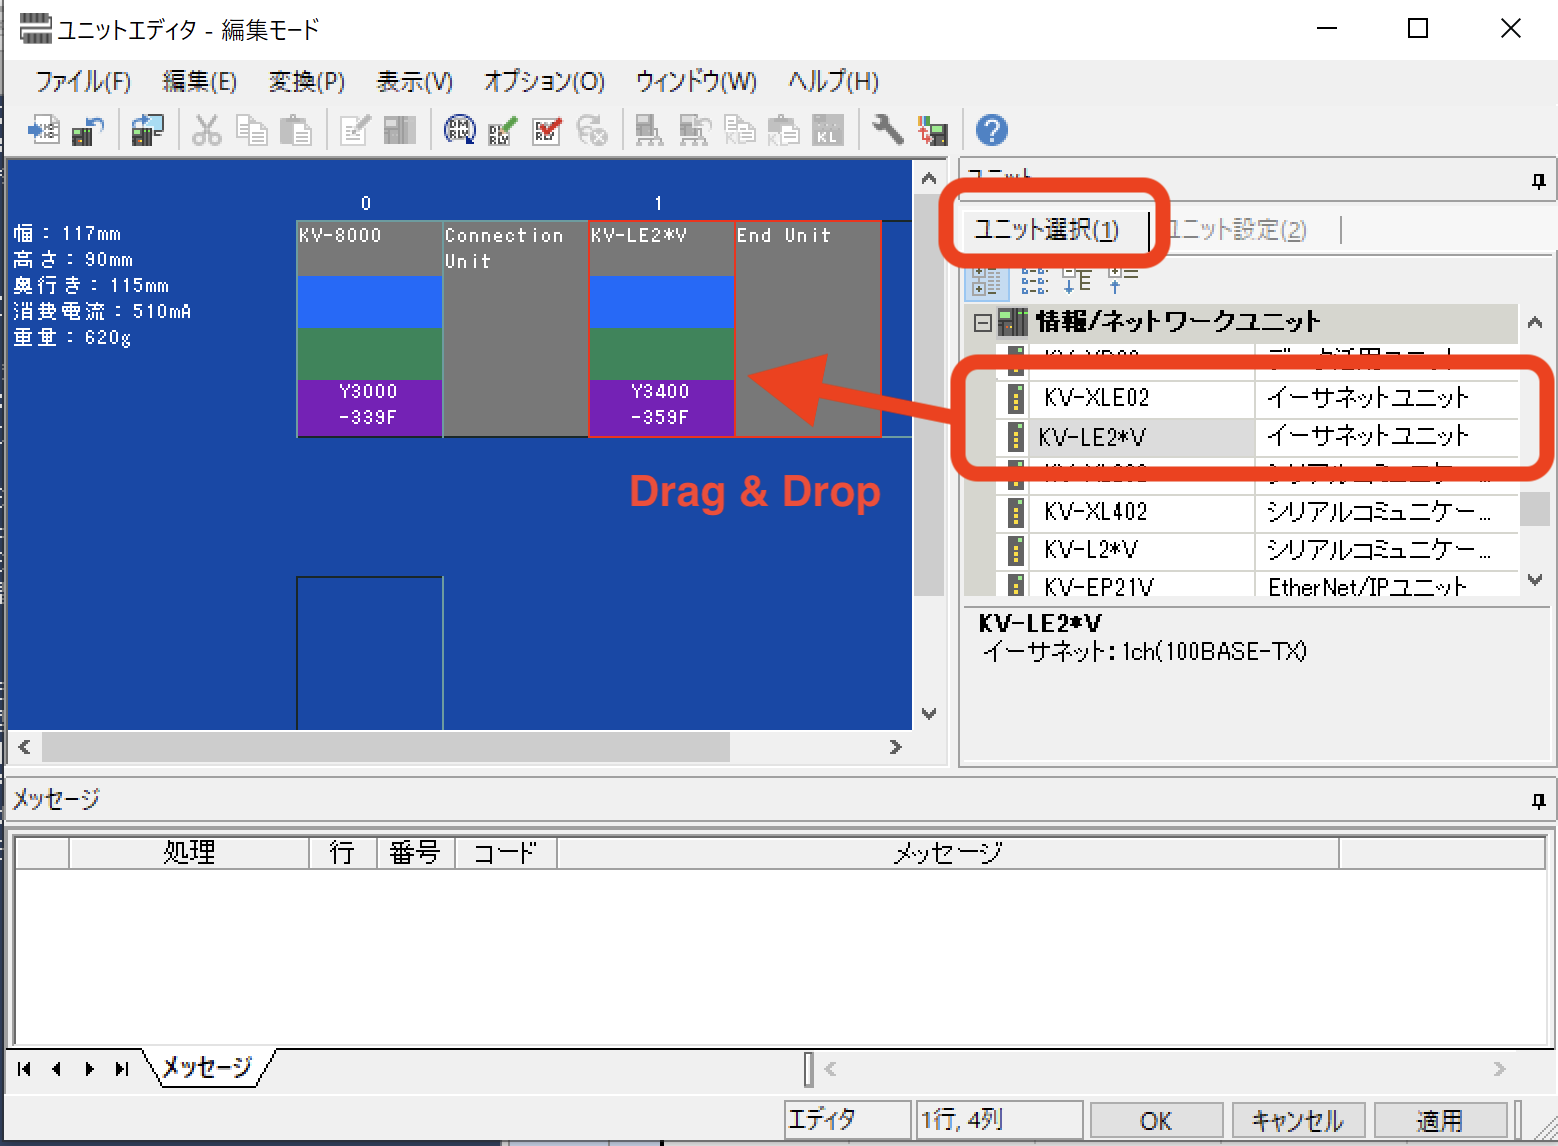
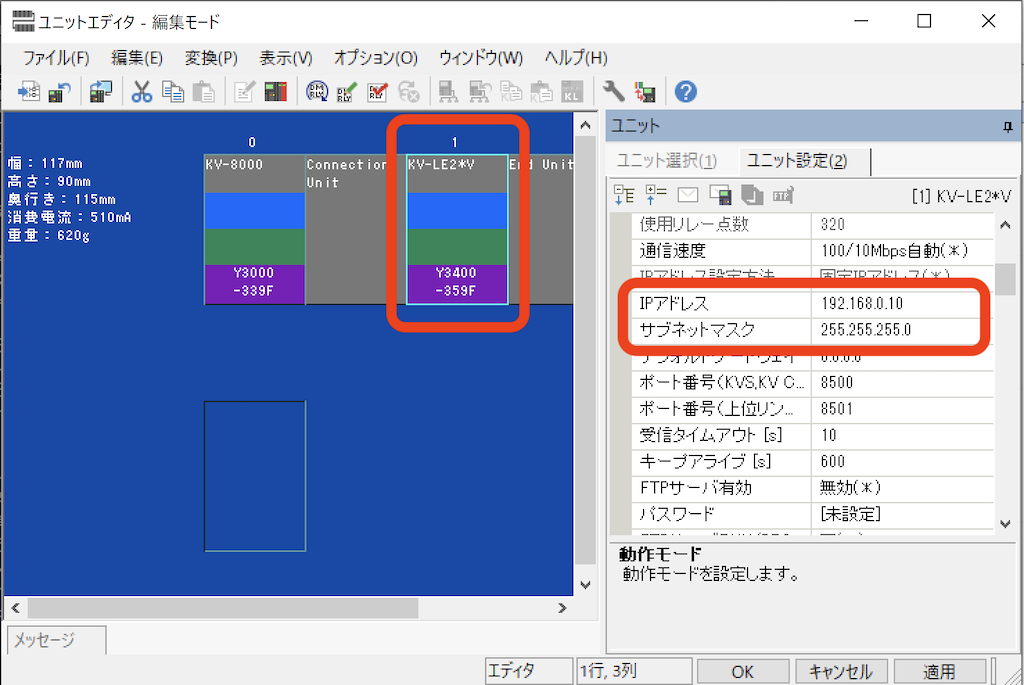
- Select the Ethernet module, then choose the Unit Settings (2) tab in the unit view on the right side, configure the IP address, and click the OK or Apply button.
For KV-Nano
PLC Project Creation
-
Create a new project in KV Studio.
From the File menu, choose New Project...

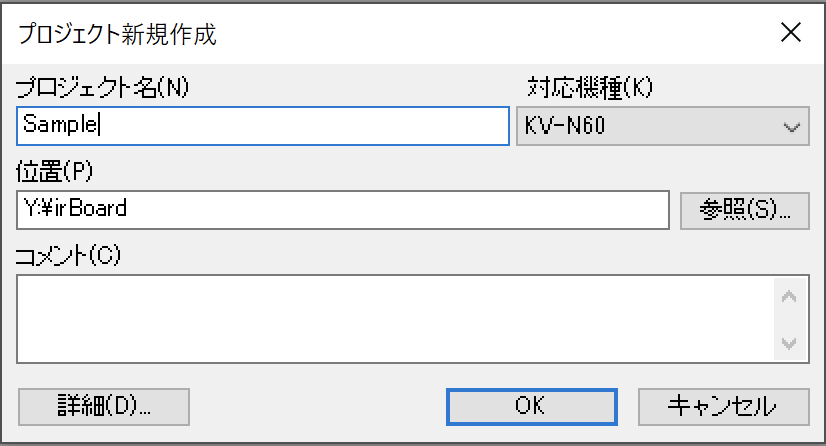
- Enter a project name and choose a model. In this case, KV-N60 is the selected option.
Ethernet unit settings
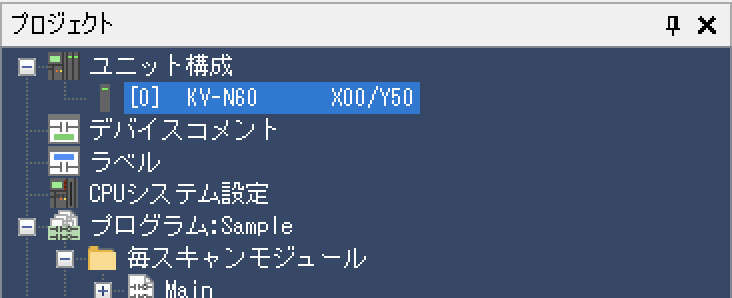
- Select and double-click the CPU unit from the unit configuration in the project view.
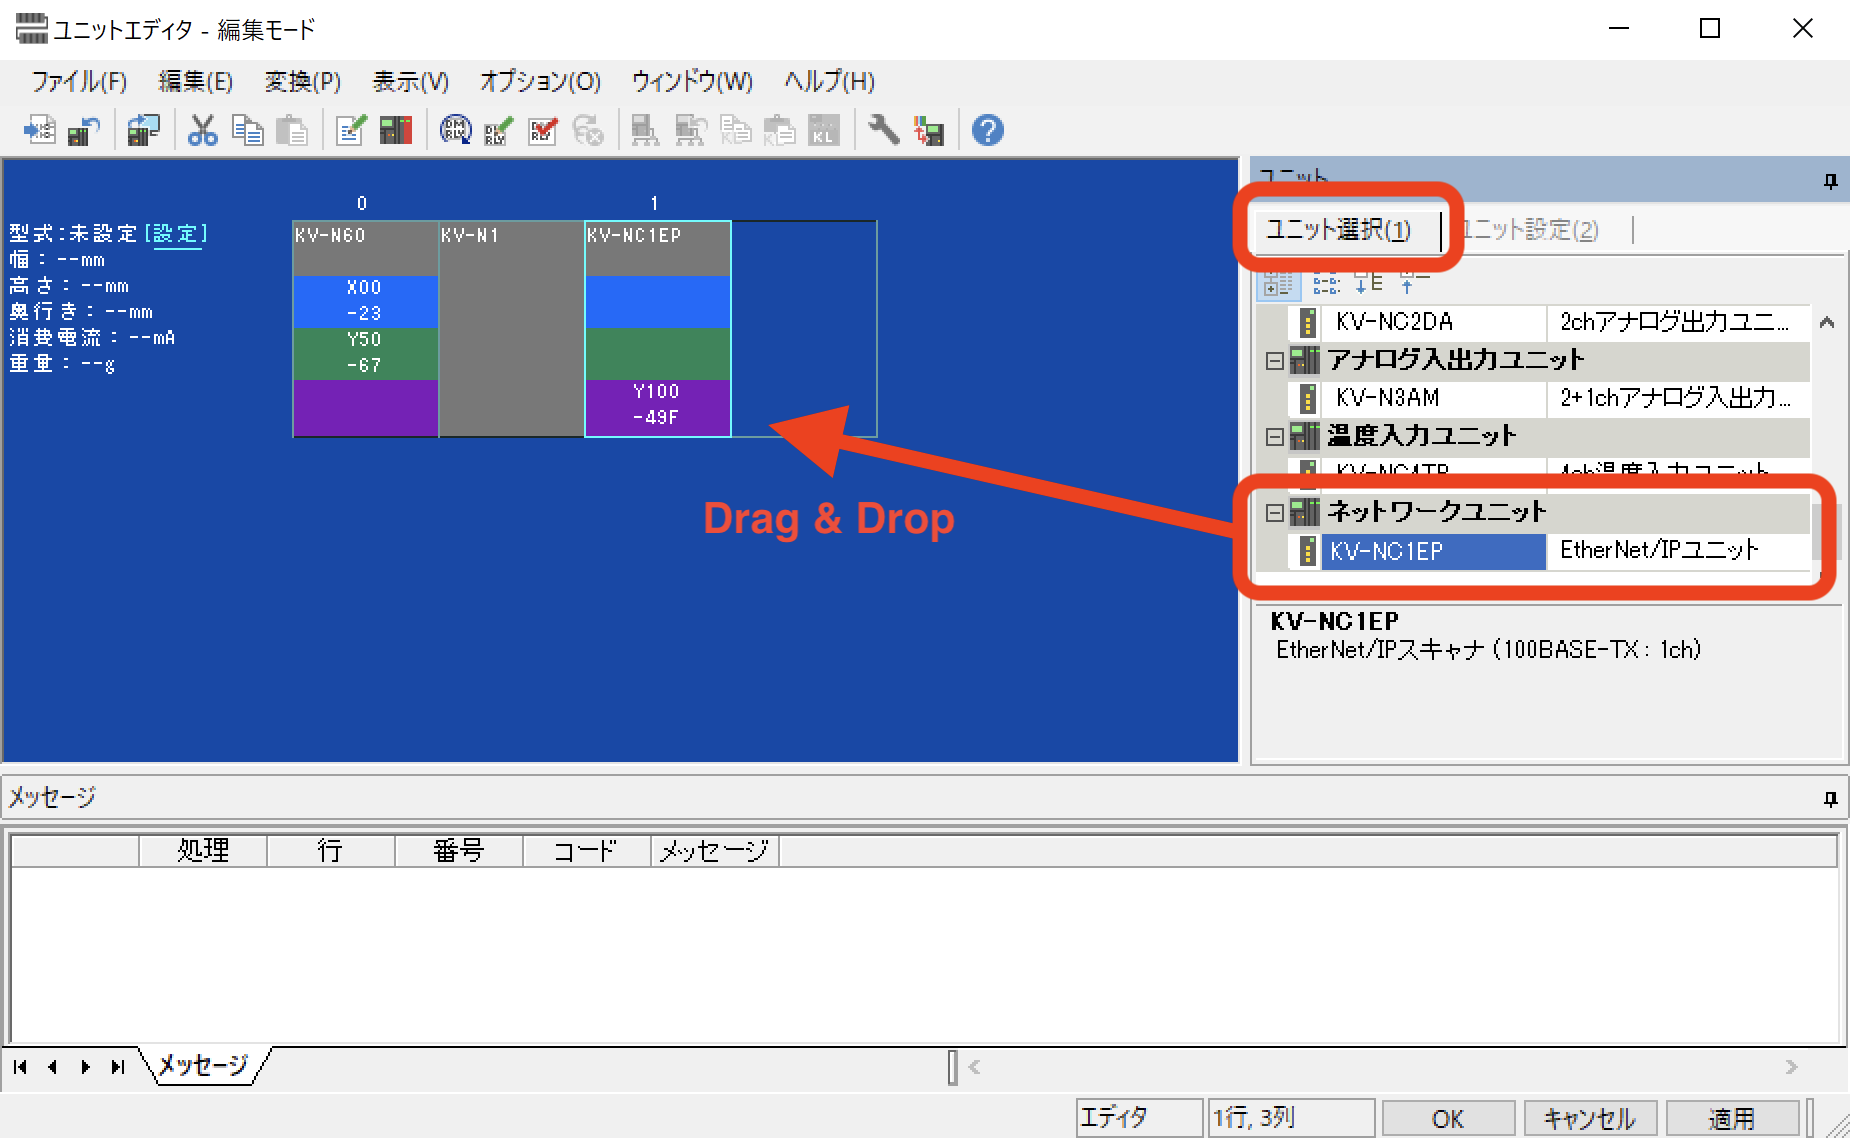
- Select the Unit Settings (1) tab in the Unit View on the right and drag the network unit away from the CPU unit.
- Select the Ethernet module, then click on the Unit Settings (2) tab located in the unit view on the right side. Configure the IP address and press the OK or Apply button.
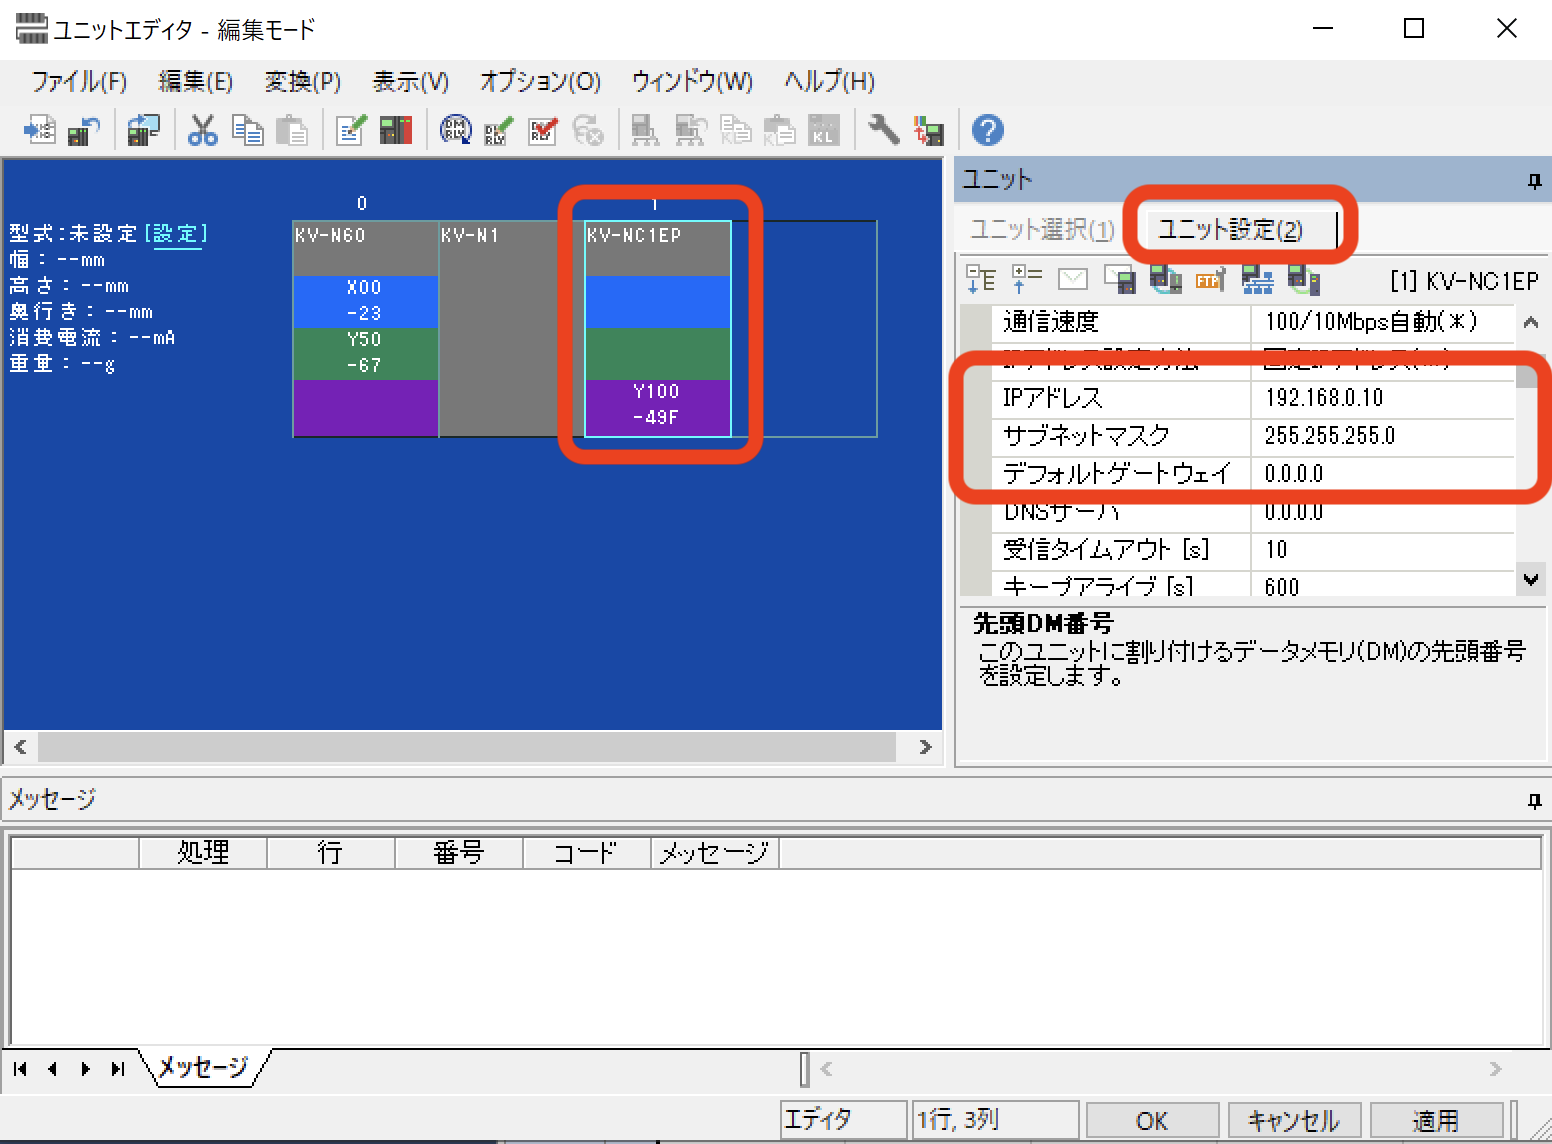
- Once the setup is complete, transfer the project to the PLC.
* We don’t have an English version of some applications. Some screenshots are from the Japanese edition. Please locate a similar screen in your application.