Documentation
MITSUBISHI: MC Protocol(Binary)
It communicates with Mitsubishi Electric Corporation PLCs using the MC Protocol (Binary).
For Q/L CPU
PLC Project Creation
-
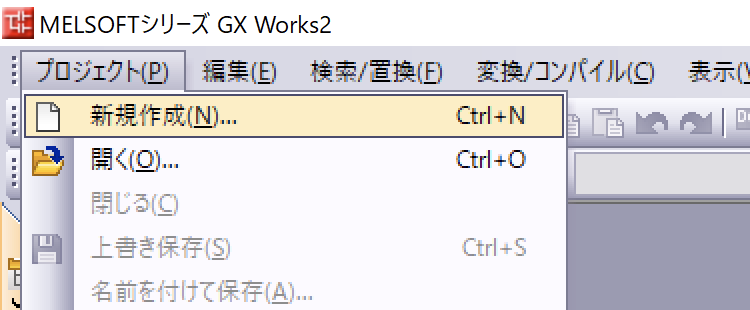
Create a new project in GX Works2.
From the File menu, select New... from the File menu.
-
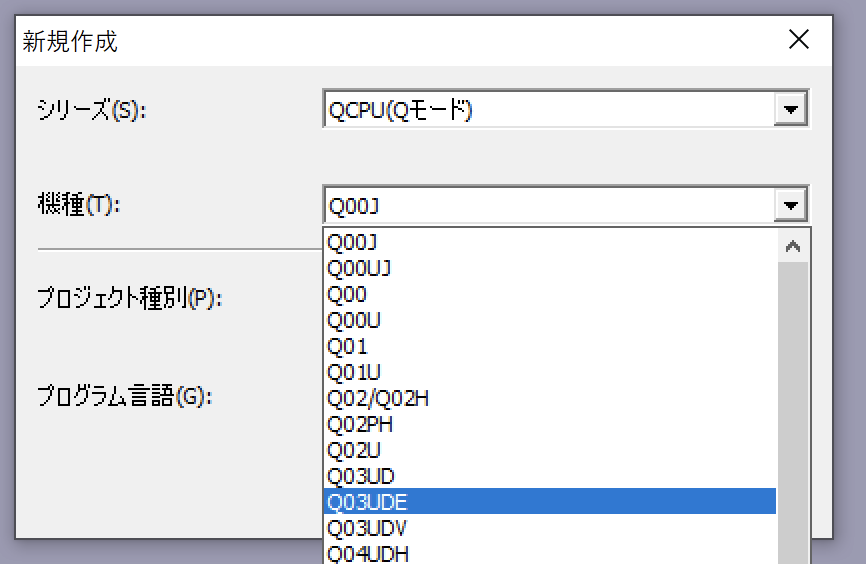
The Q03UDE CPU is targeted here.
Select Q03UDE from the models and press the OK button to create the project.
For Ethernet with built-in PLC
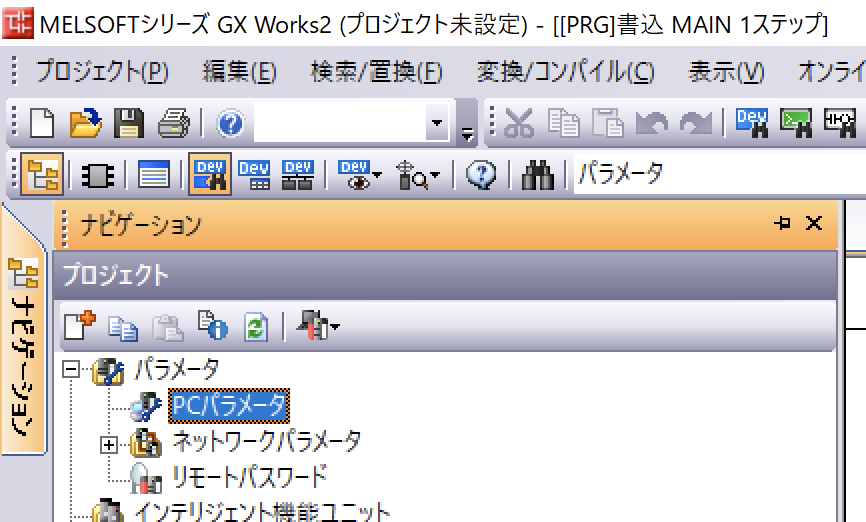
- Double-click a PC parameter in the Parameters group of the Navigation View to open it.
-
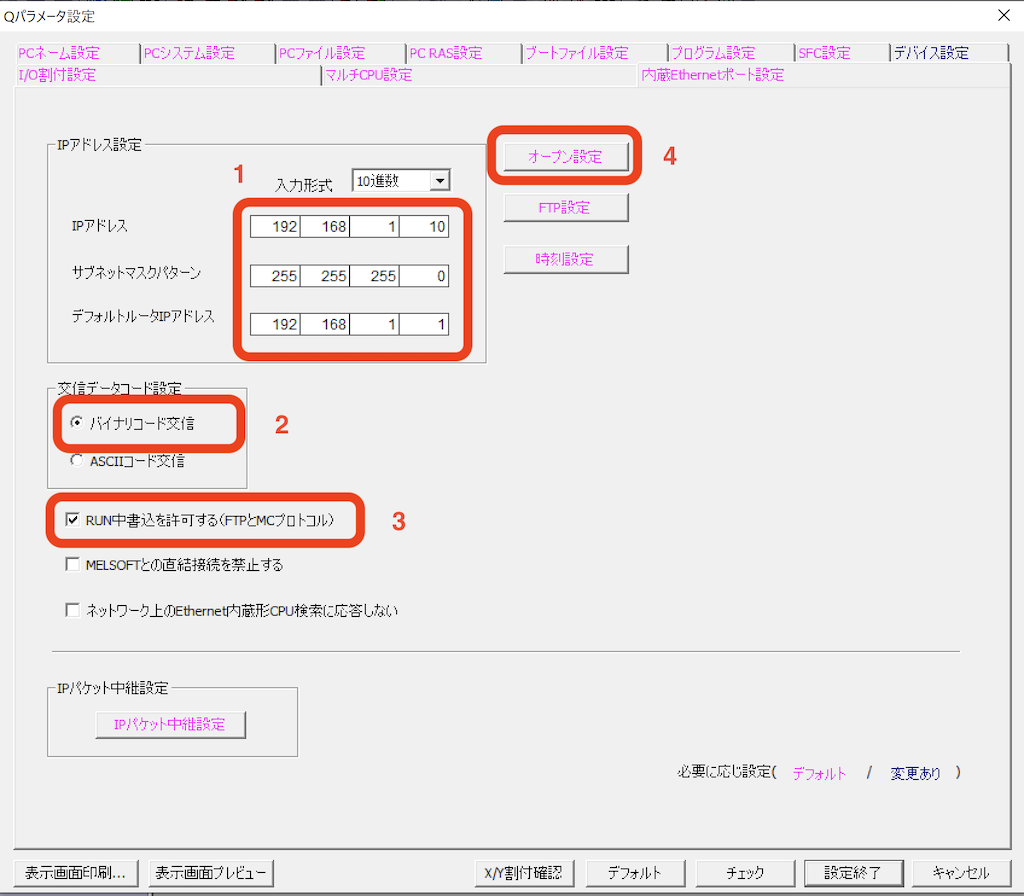
Establish the IP address relationship to assign to the PLC.
When setting up the IP in irBoard, specify the IP address provided here. - Ensure that the communication data code configuration is set to binary code communication.
- Check the “Enable Online Change” checkbox.
- Press the Open Setup button.
- Please input the following in the empty line.
- Proctol: TCP
- Open system: MC Protocol or Unpassive
-
Host Station Port No. : 5010
The port number is set to 5010; however, you can choose any available port number when configuring the settings on irBoard. - After entering the information, click the End” button.
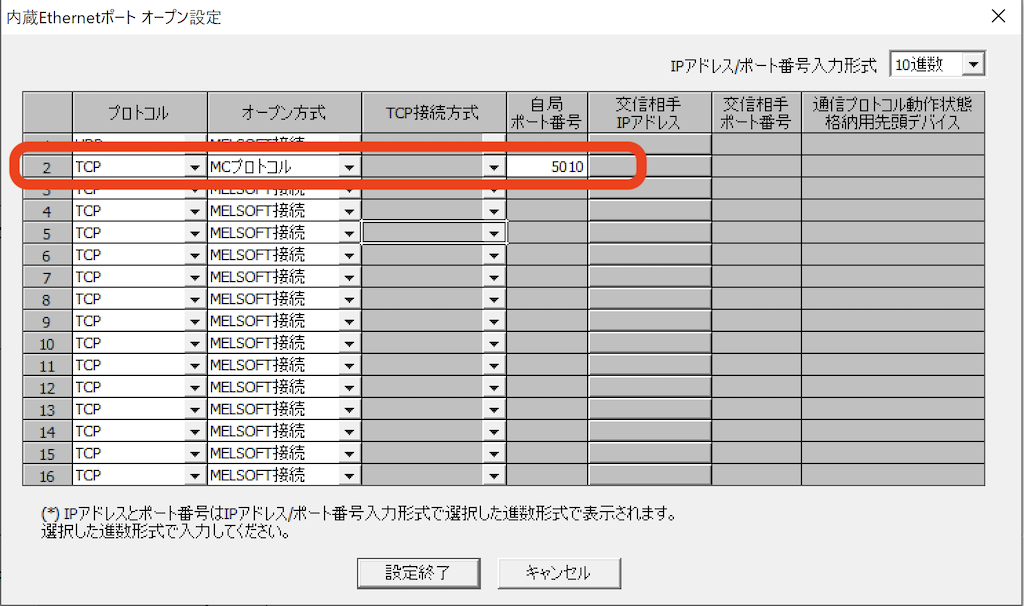
- Also, press the End button on the parameter setting screen.
- Transfer the project to the PLC and reset or turn the power back on.
For QJ71E71-100
- Double-click to access Ethernet/CC IE/MELSECNET in the Network Parameters under the Parameters group in the Navigation View.
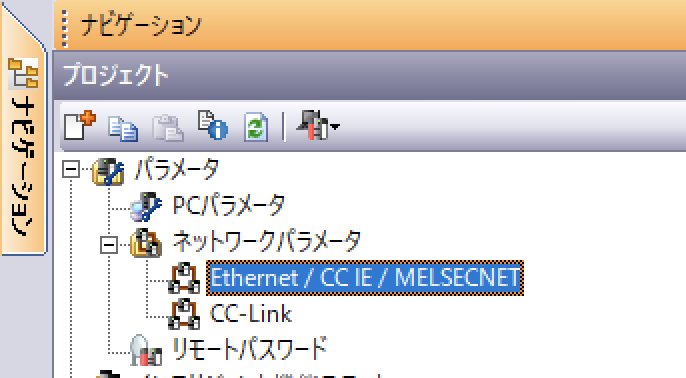
- Choose Ethernet as the network type for the relevant unit.
- Enter the Start I/O No. field.
- Enter the Network No.
- Enter the Station No.
- Click on the Operation Settings item.
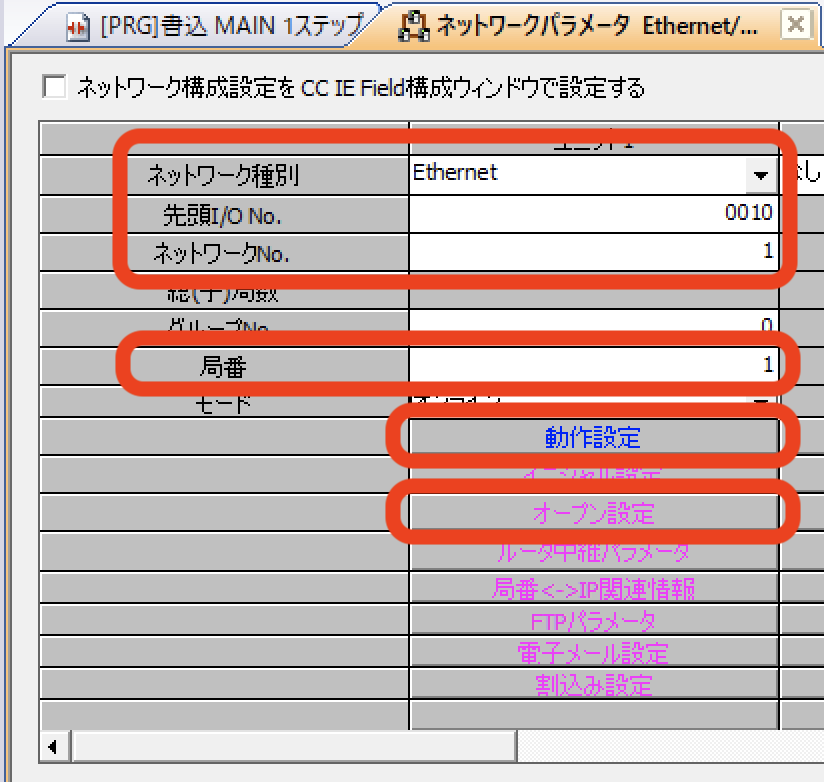
- Ensure that the communication data code configuration is set to binary code communication.
- Select "Do not wait for OPEN" in the initial timing settings.
- Set the IP address.
- Check the “Enable Online Change” checkbox.
- Press the End button.
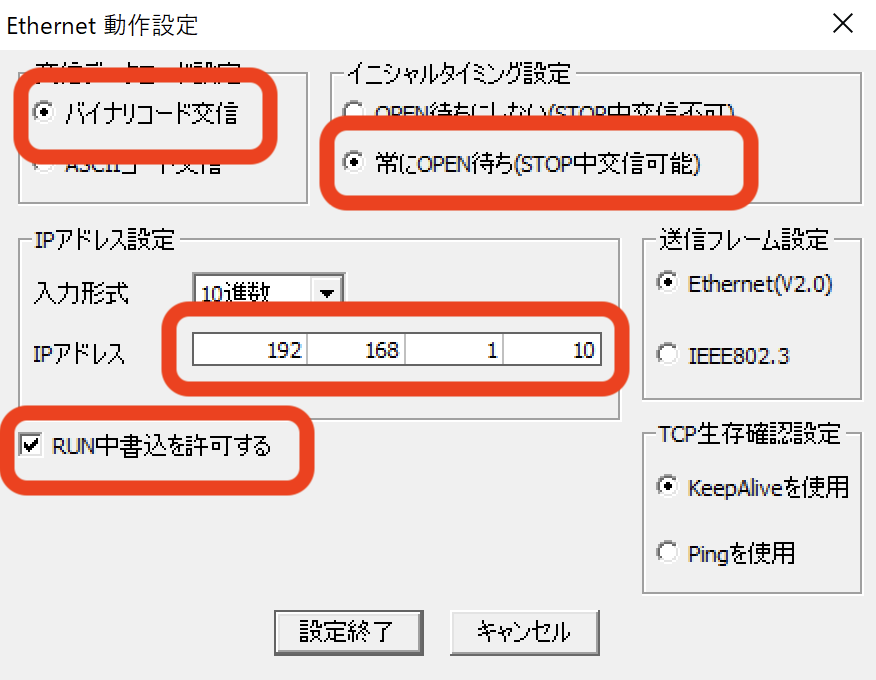
- On the returning screen, click on the Open Settings option.゜
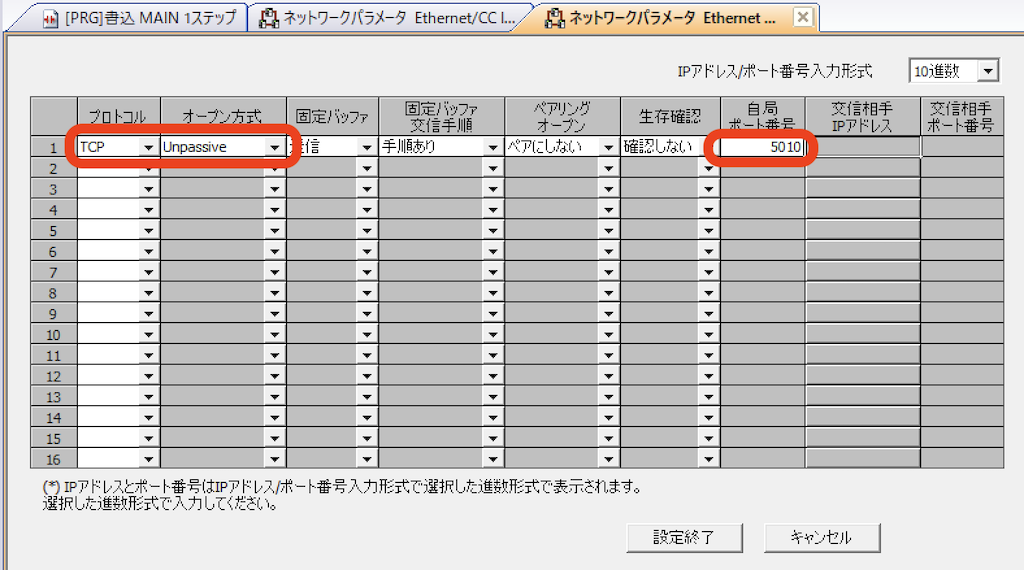
- Please input the following in the empty line.
- Proctol: TCP
- Open system: MC Protocol or Unpassive
-
Host Station Port No. : 5010
The port number is set to 5010; however, you can choose any available port number when configuring the settings on irBoard. - After entering the information, click the End” button.
- Also, press the End button on the parameter setting screen.
- Transfer the project to the PLC and reset or turn the power back on.
For iQ-R CPU
PLC Project Creation
-
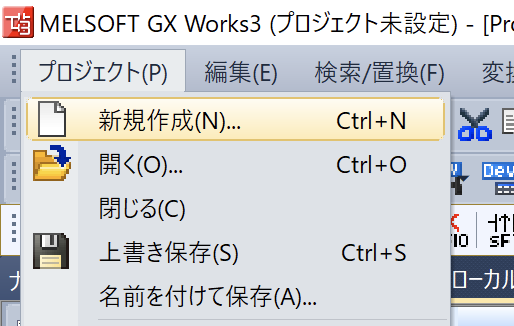
Create a new project in GX Works3.
From the File menu, select New... from the File menu.
-
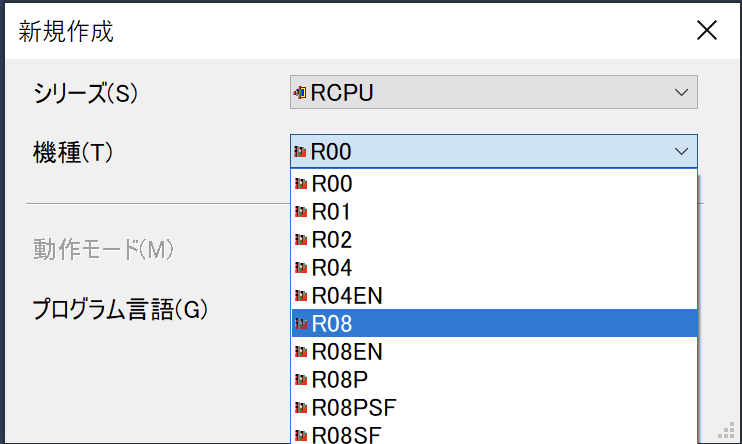
The R08 CPU is targeted here.
Select R08 from the models and press the OK button to create the project.
For Ethernet with built-in PLC
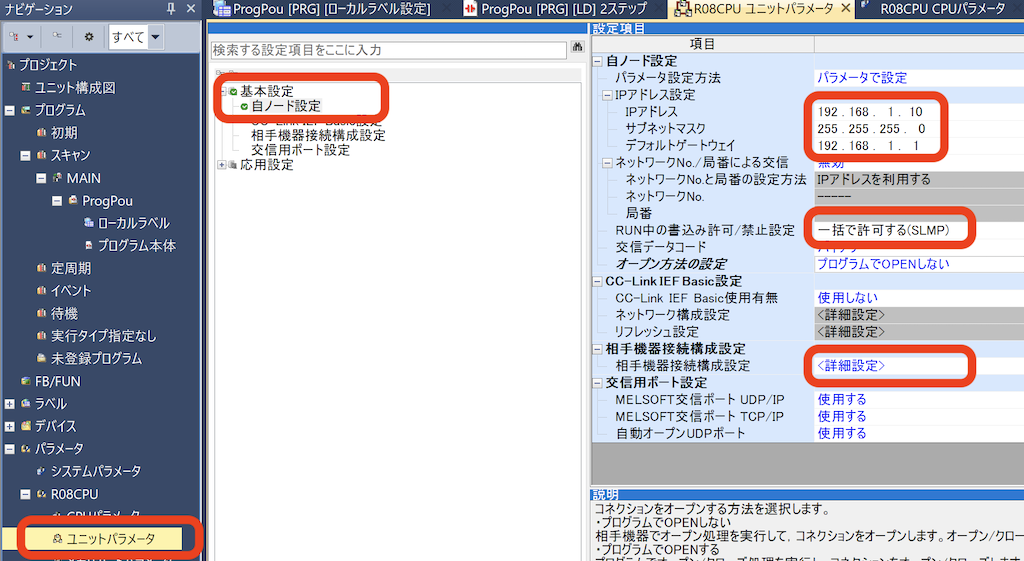
- Double-click a PC parameter in the Parameters group of the Navigation View to open it.
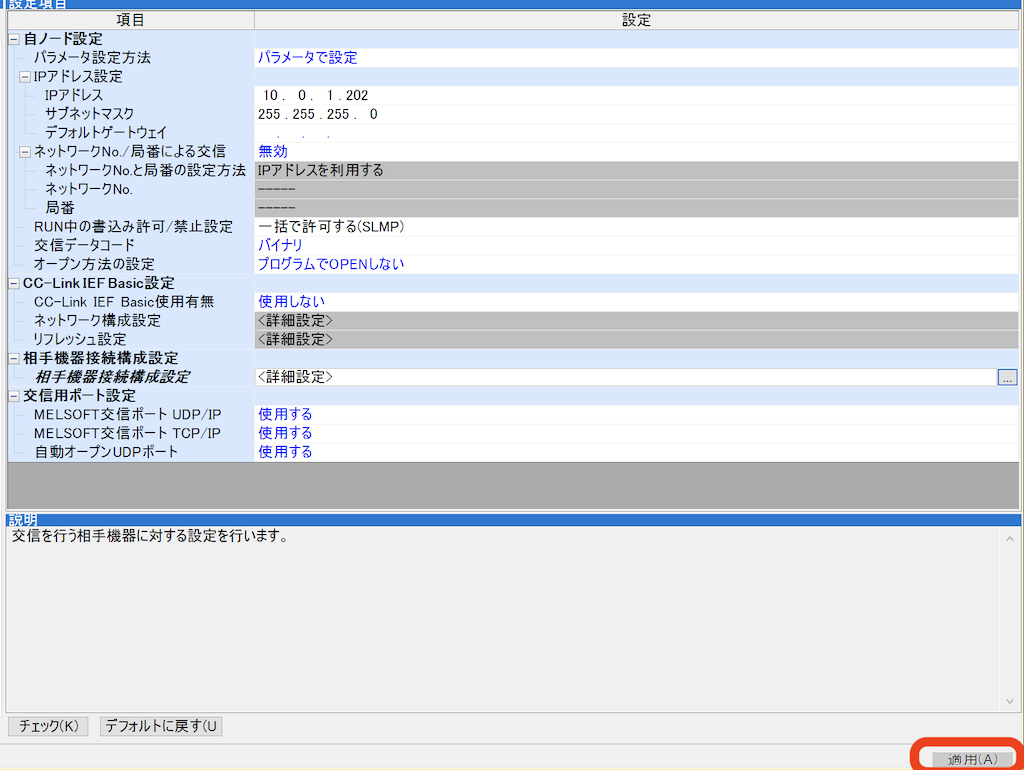
- Expand the Basic Settings group located on the left side of the screen that appears, and select Own Node Settings.
- Enter the PLC's address in the IP address settings located on the right side of the screen.
- Select “Allow all at once (SLMP)” in the write allow/prohibit settings during RUN.
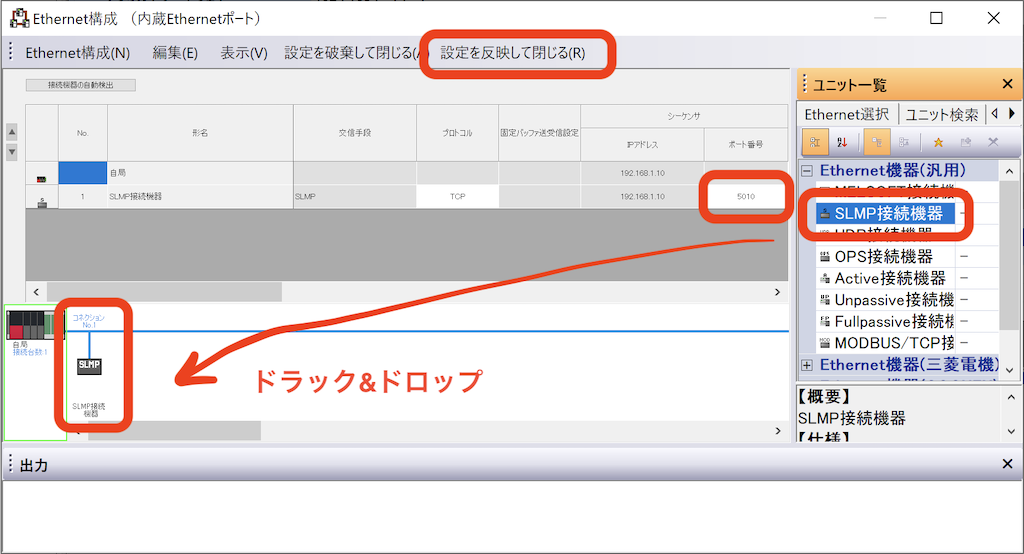
- Double-click on "Advanced Settings" in the Tabulated Configuration Settings tab.
- Expand the Ethernet Device (General) group in the list of units on the right, and drag and drop the “SLMP Connection Device” onto the PLC icon at the bottom of the screen.
- A line will be added in the upper column, and the port number will be set to 5010. You can select any available port number while configuring irBoard.
- Click End to apply the settings.
- Click the Apply button on the screen that appears.
- Transfer the project to the PLC and reset or turn the power back on.
* We don’t have an English version of some applications. Some screenshots are from the Japanese edition. Please locate a similar screen in your application.